
Making a Wooden Guitar Keychain
A friend of mine plays electro-guitar as a hobby and he’s rather good at it so I decided to make a keychain of his guitar as a birthday gift. His guitar has a black body and wooden neck so I wanted to mimic that duotone look. I had some 6mm walnut and cherry stock lying around and they were perfect for the job. The dark look of the walnut would mimic the black body perfectly and the cherry for the neck would contrast nicely with the walnut.
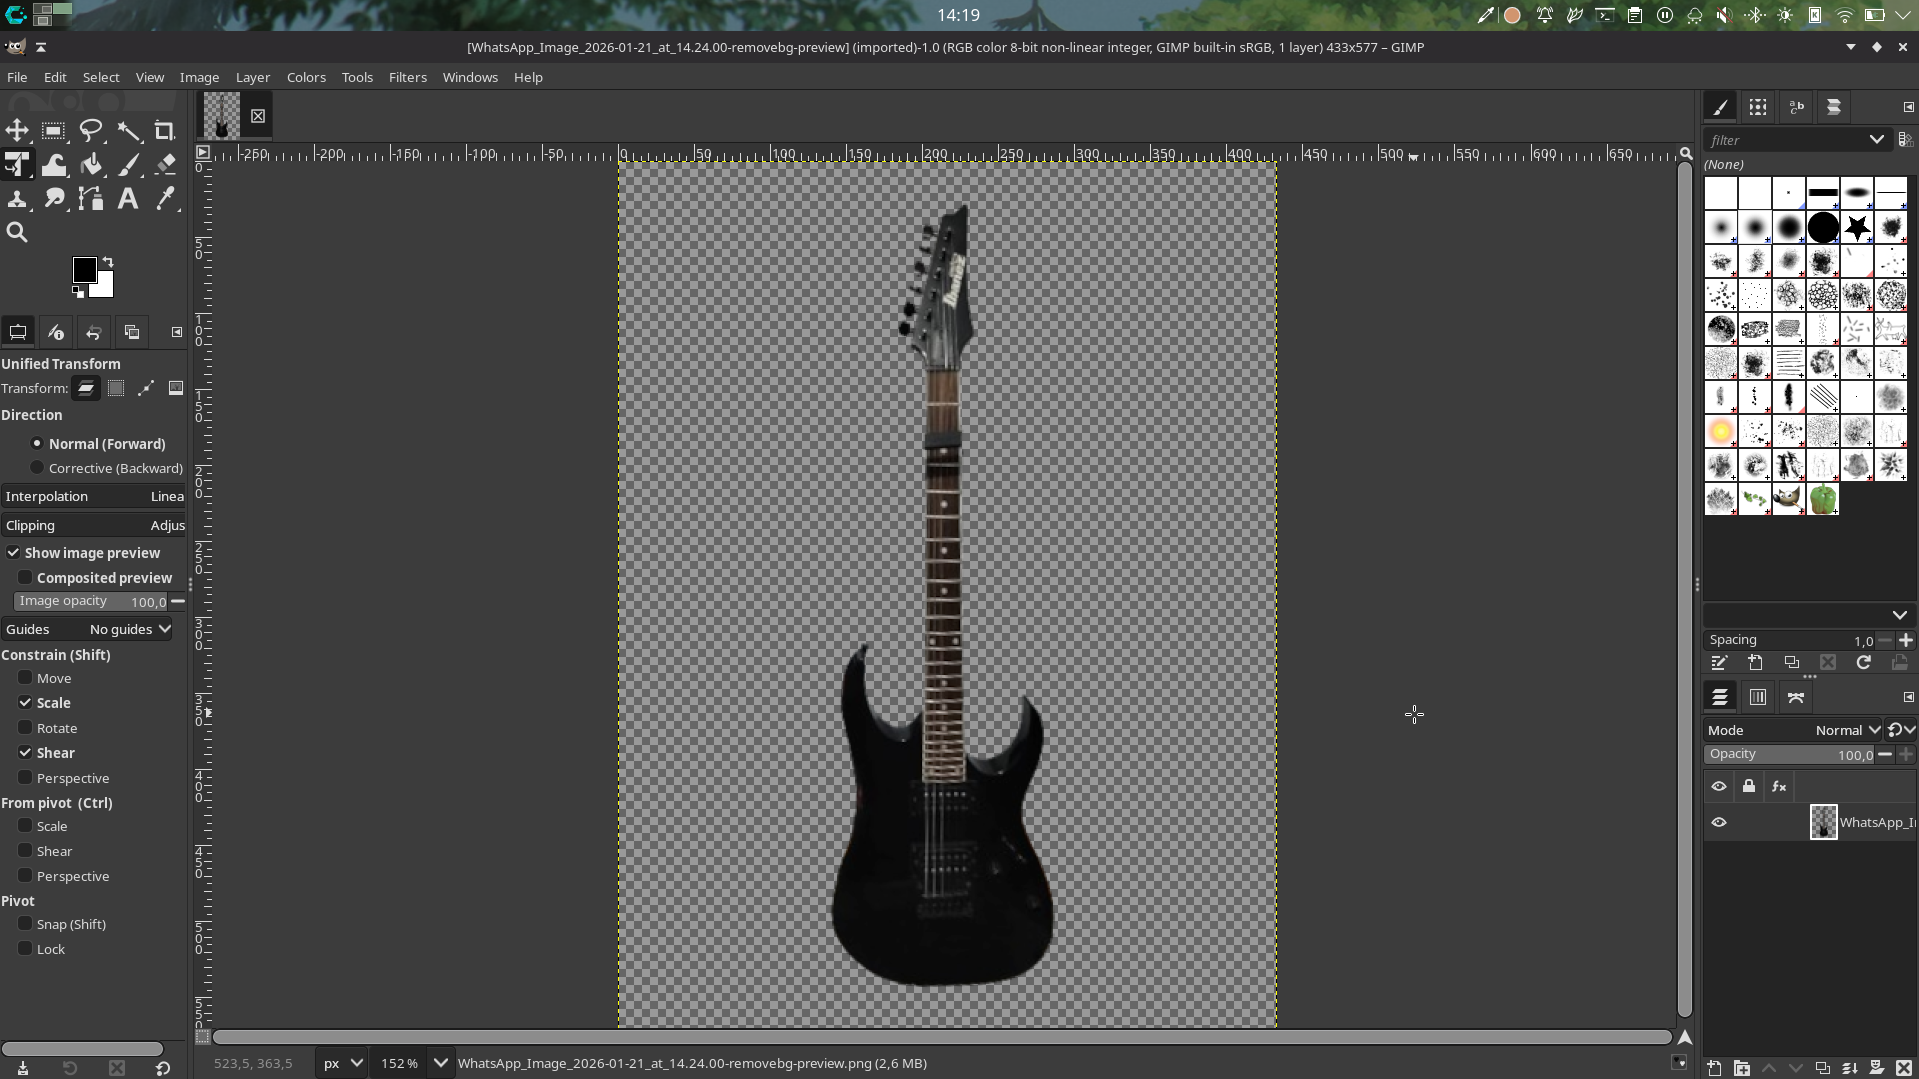
I like to start these kinds of projects digitally so I get a rough idea of what I’m trying to make and get the templates ready. I already had a photo of my friend’s guitar at hand so I started by isolating it from the background in GIMP (GNU Image Manipulation Program).
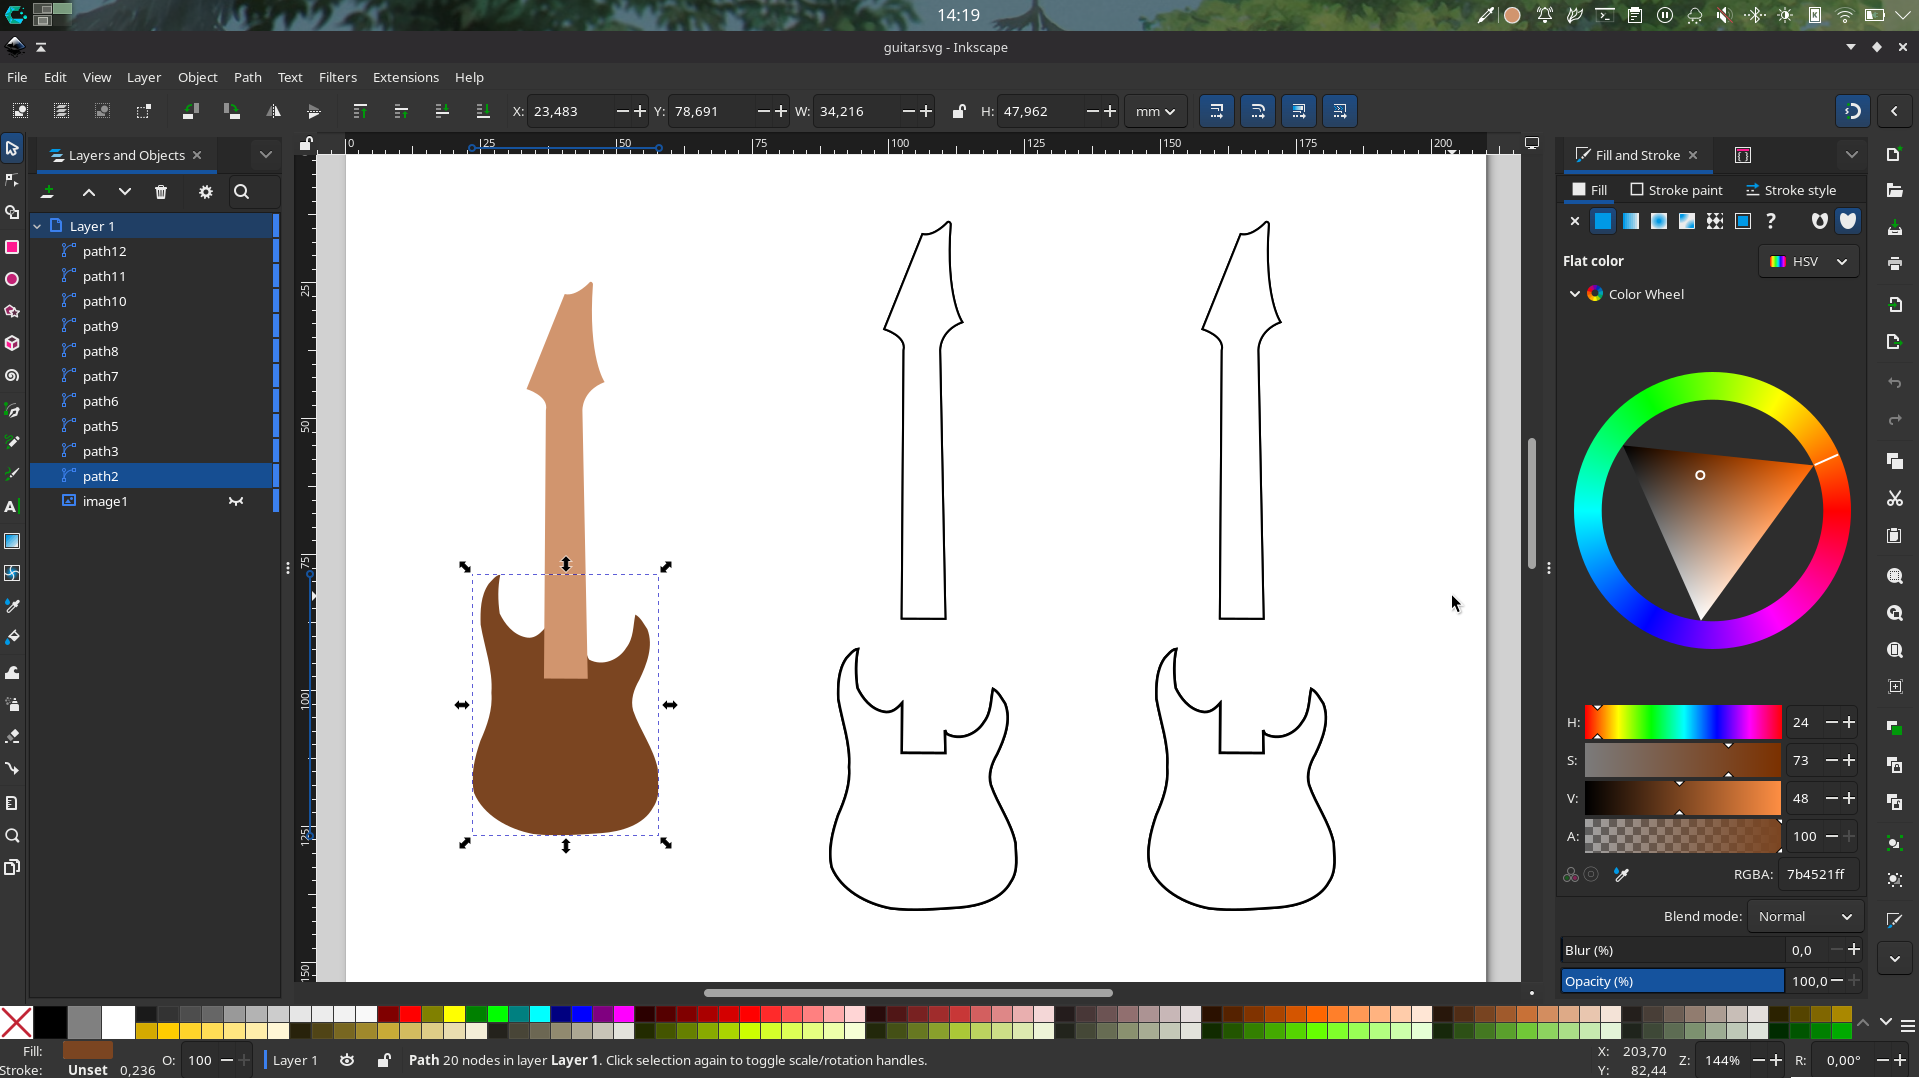
After isolating the guitar in GIMP, I opened the image in Inkscape. Using Inkscape’s awesome “Trace Bitmap” function, I created a vector outline of the guitar and scaled it to fit the size of a keychain on the A4 paper. I also messed with the proportions a bit to make it more keychain-like, shortened the length of the neck and made the body a little chubbier.
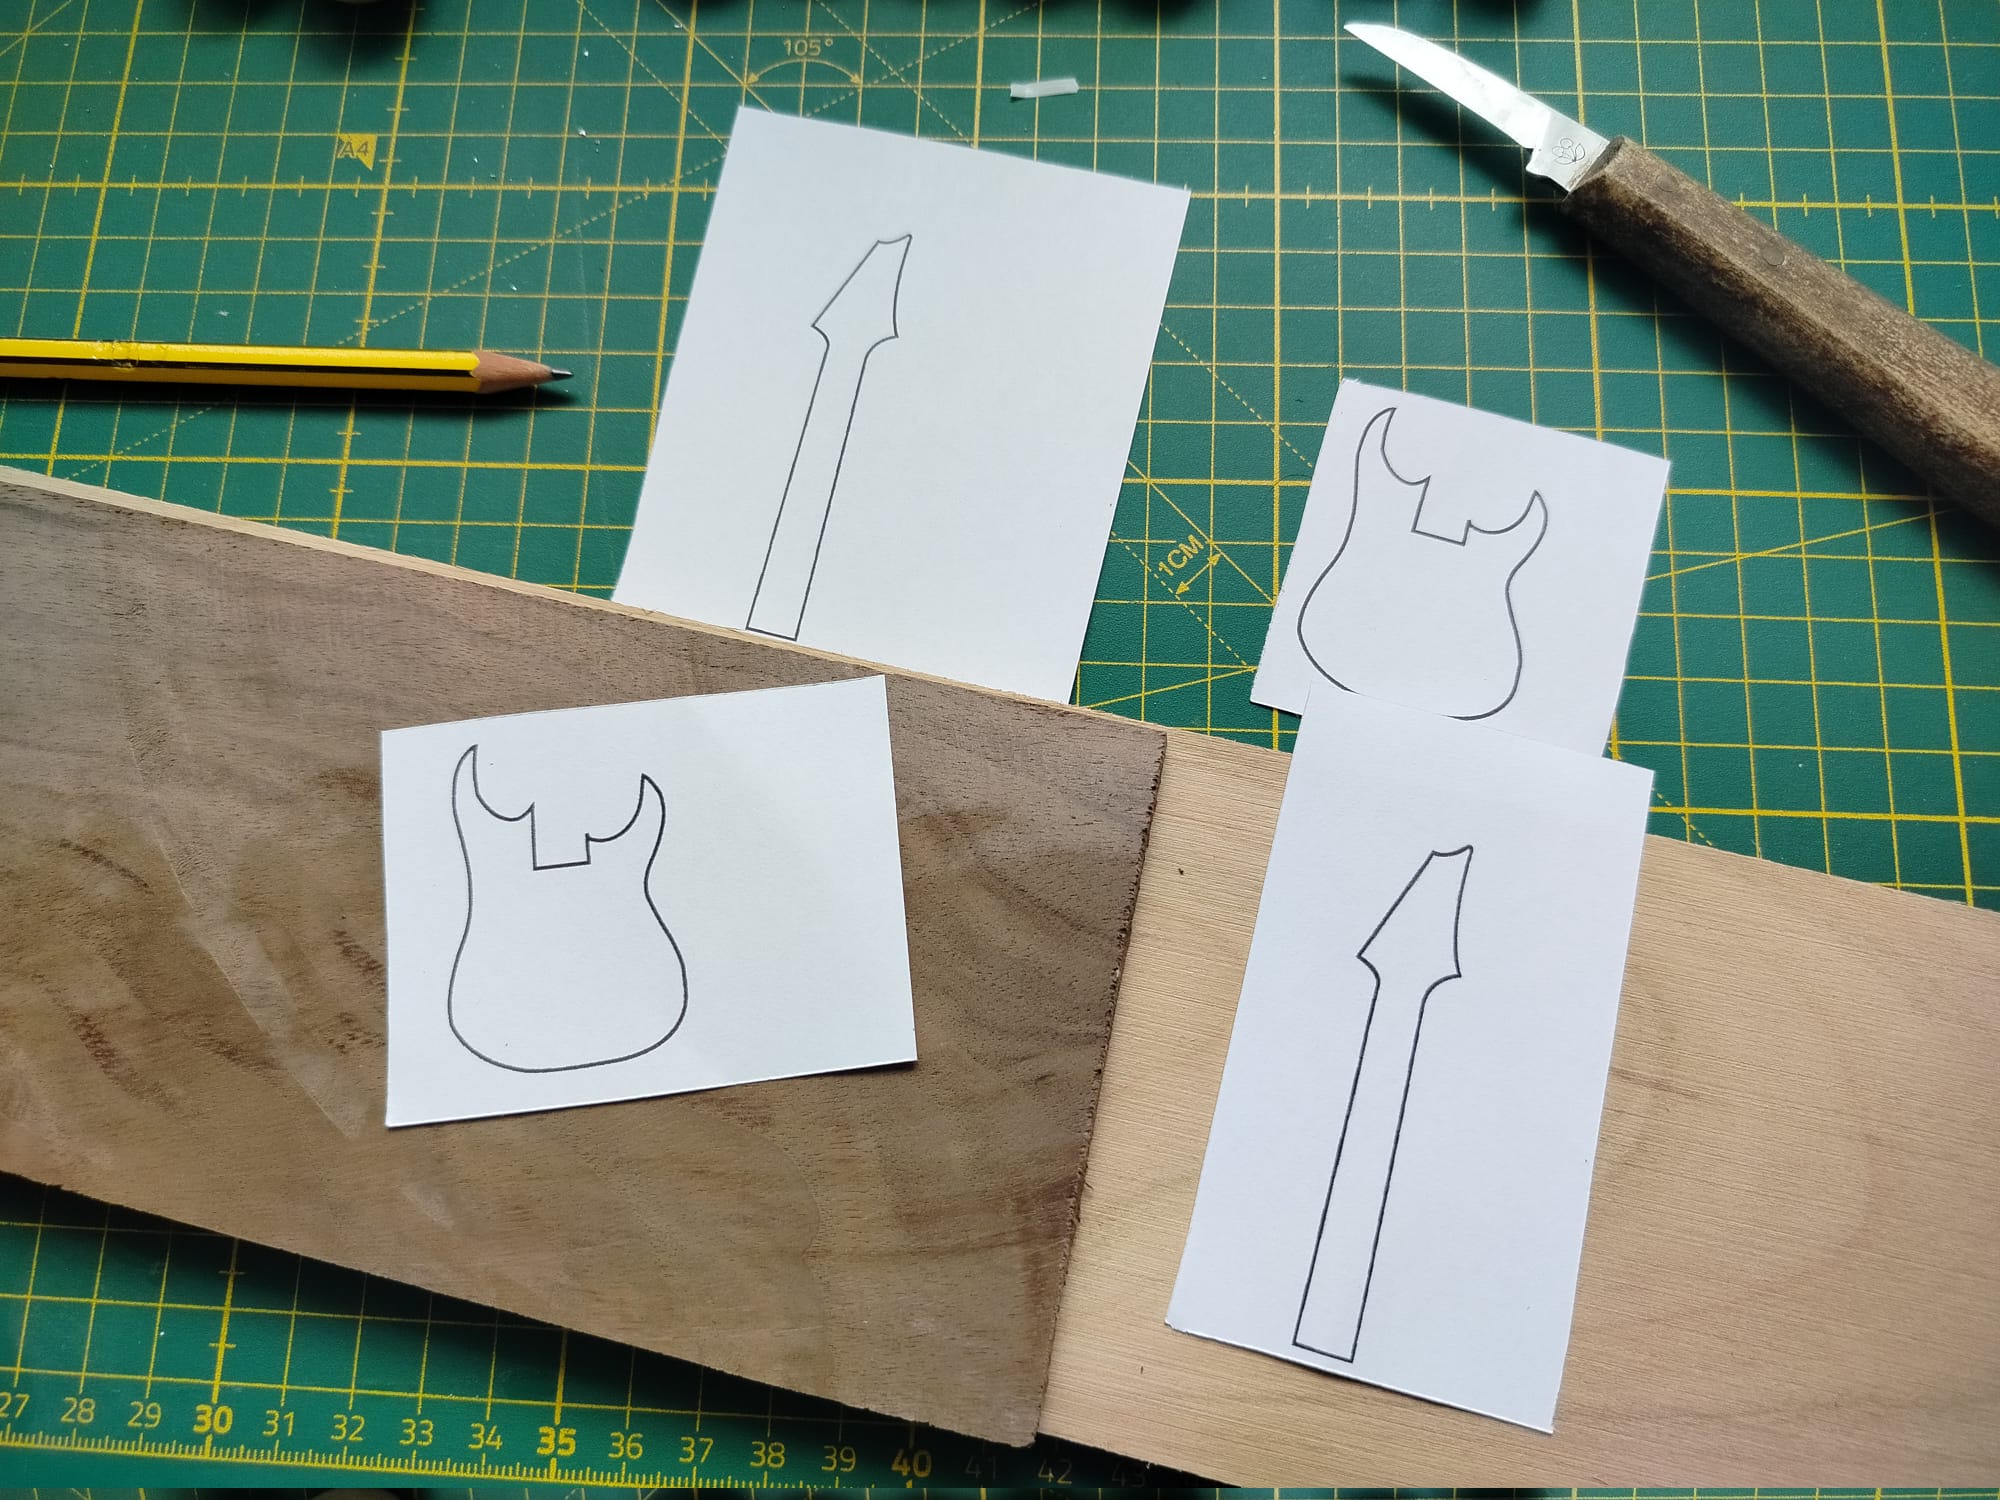
And after that, the sheet is sent to the printer. Here are the templates with the wood stock I mentioned.
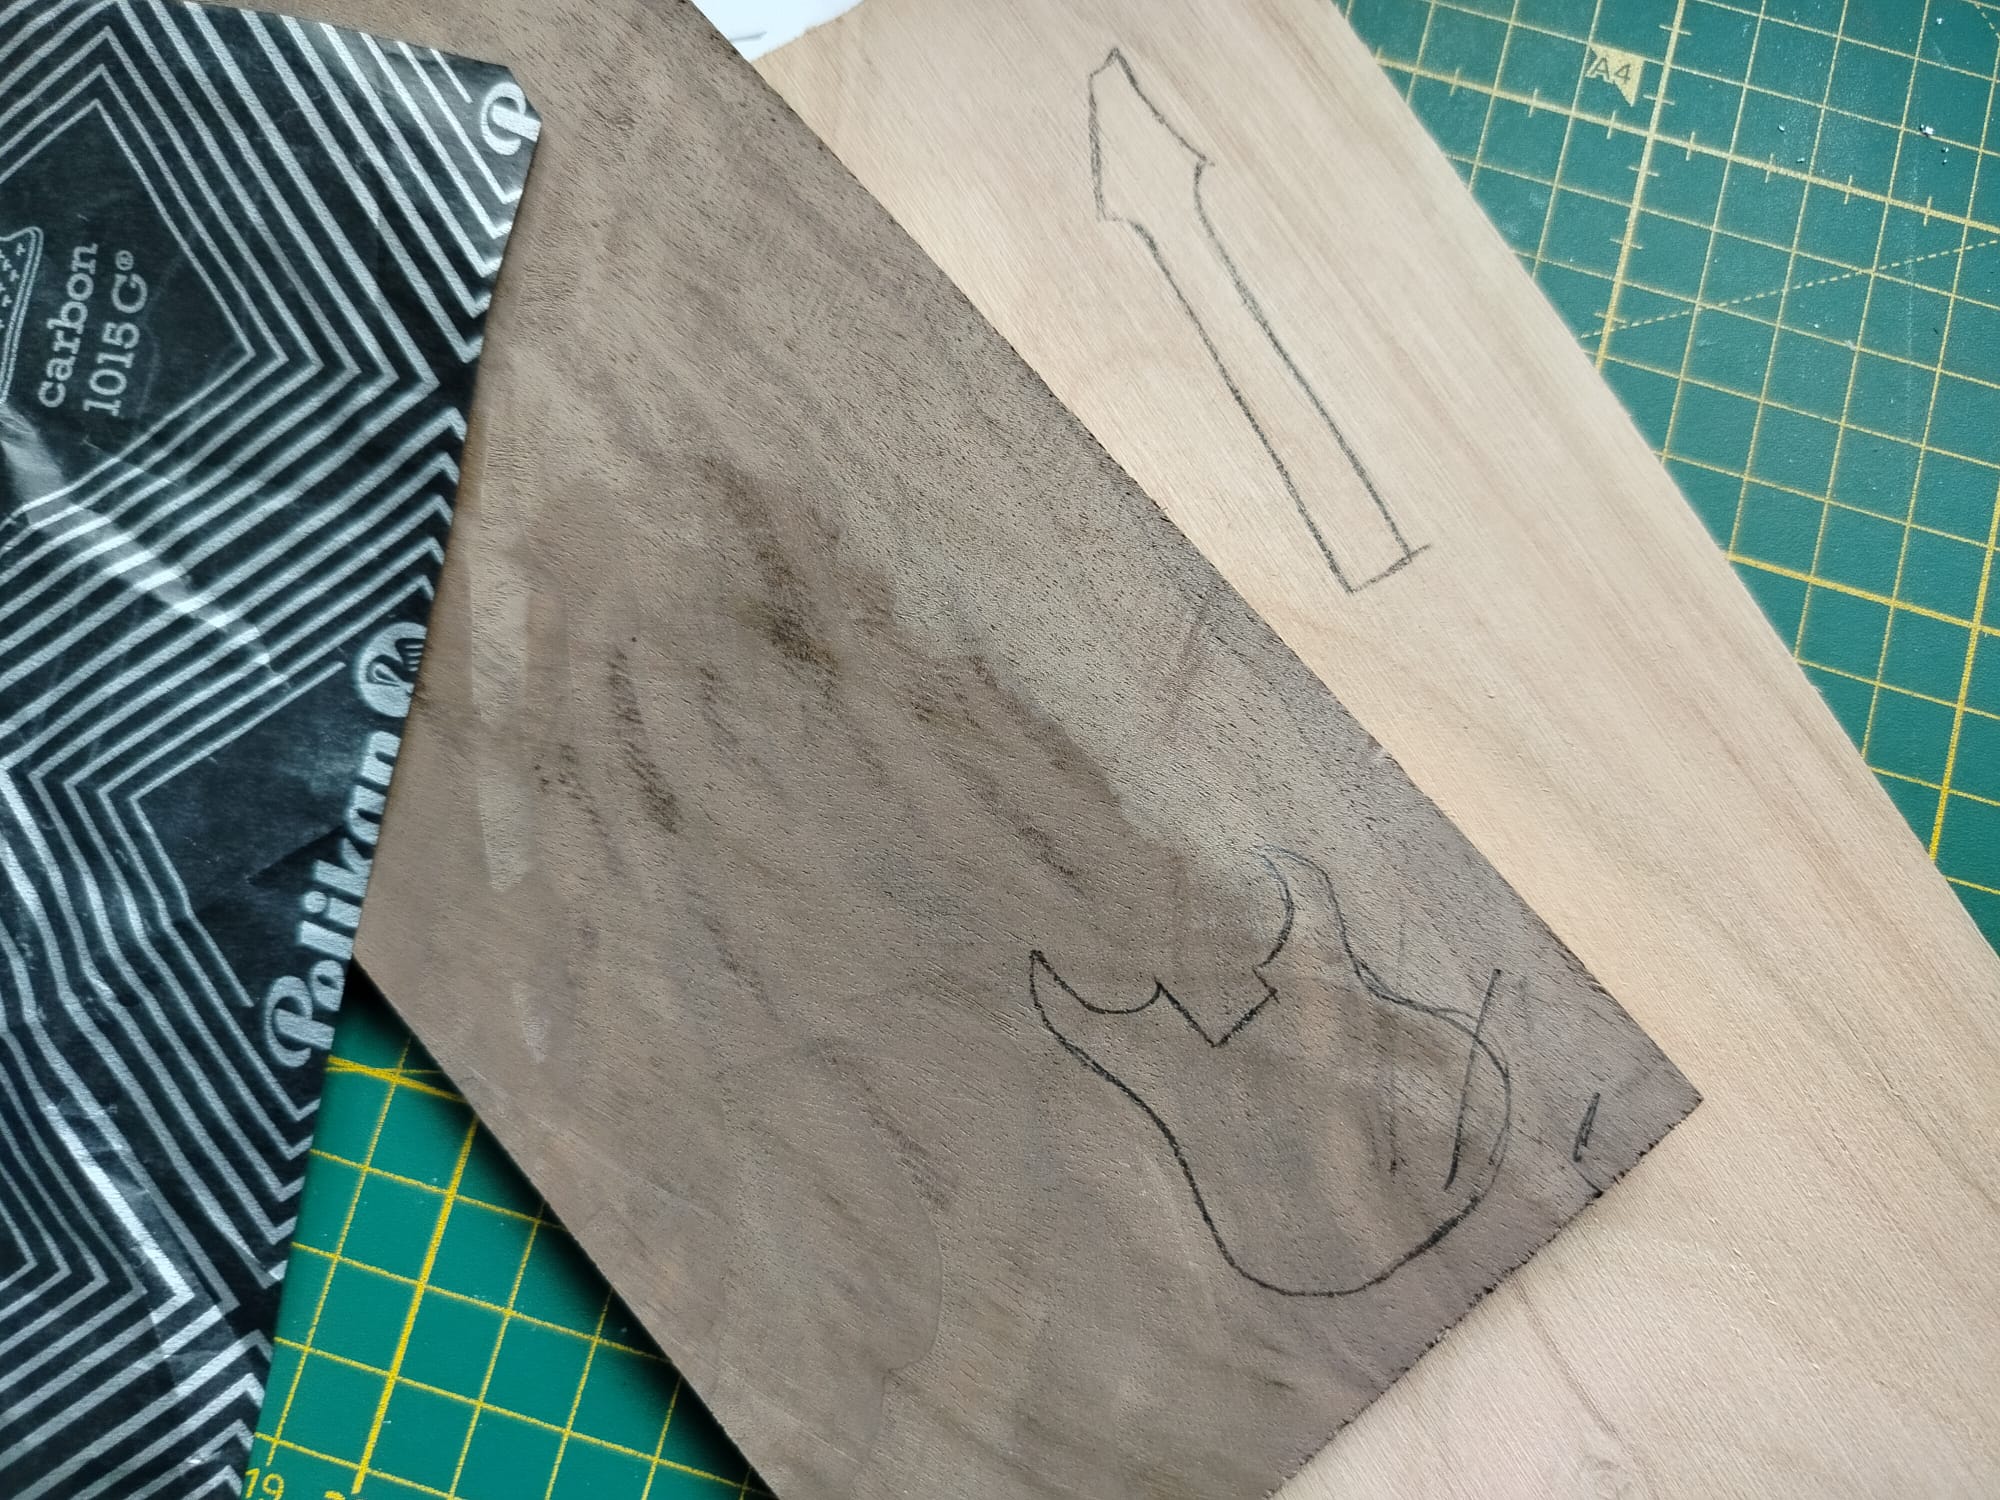
Then I used carbon paper to transfer the templates onto the stock. Surprisingly, black carbon paper has decent contrast even with the dark walnut.
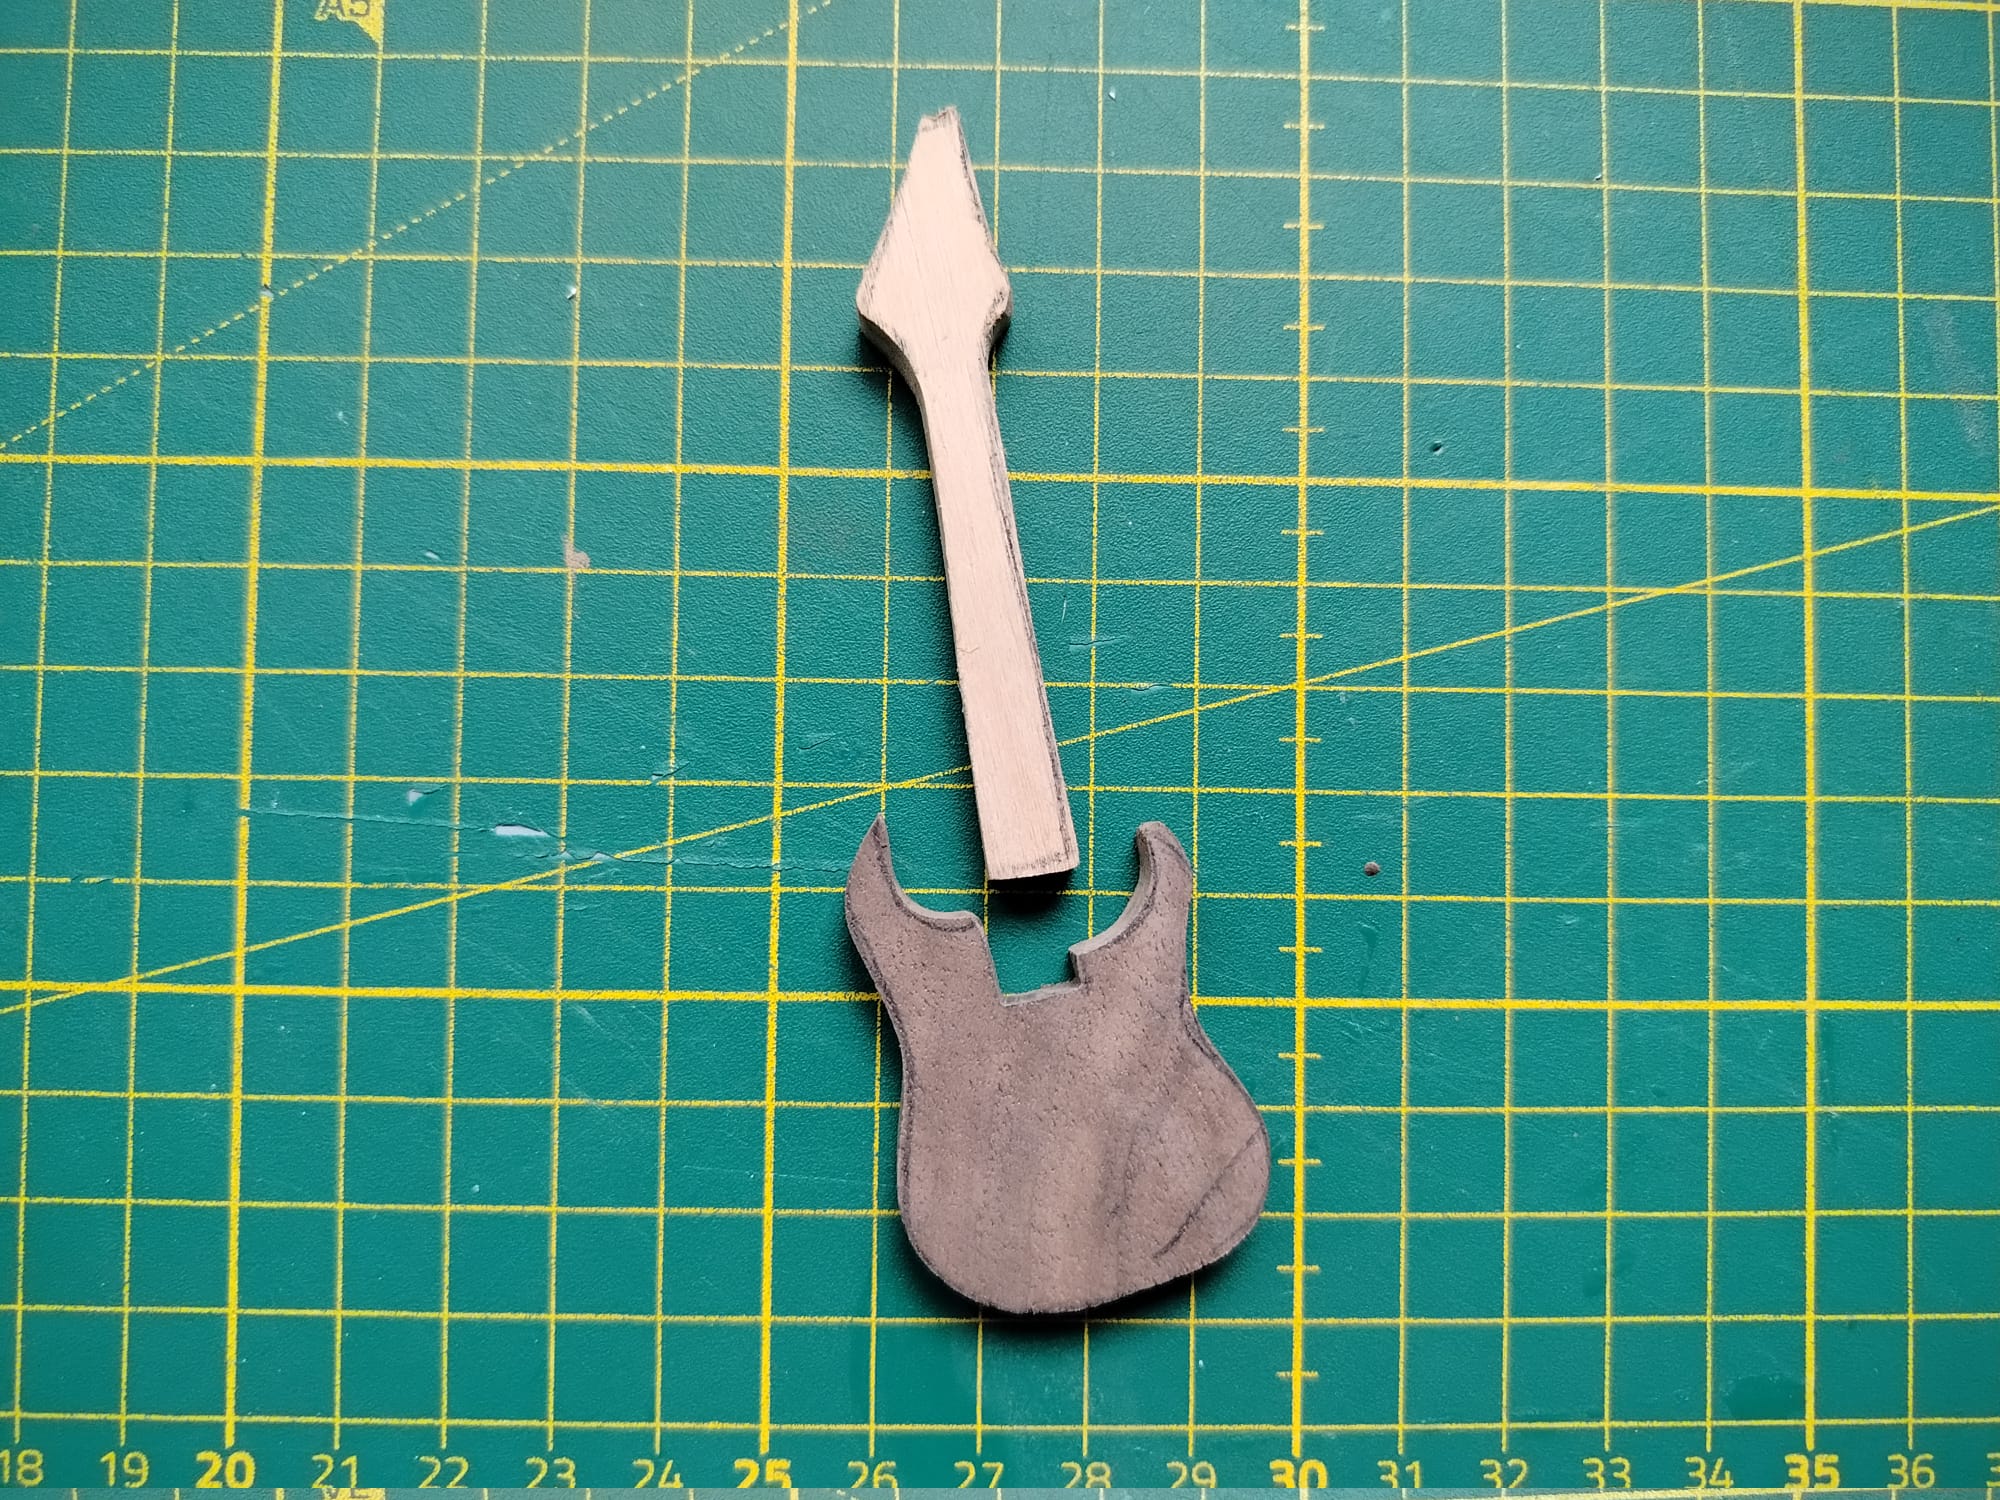
After the templates are transferred, it’s onto the scrollsaw! I still lowkey suck at using the scrollsaw so I mainly use it to roughout the shapes instead of cutting it exactly to the millimeter. Took me about 30 min (told ya I suck 💀) to cut both of the pieces.


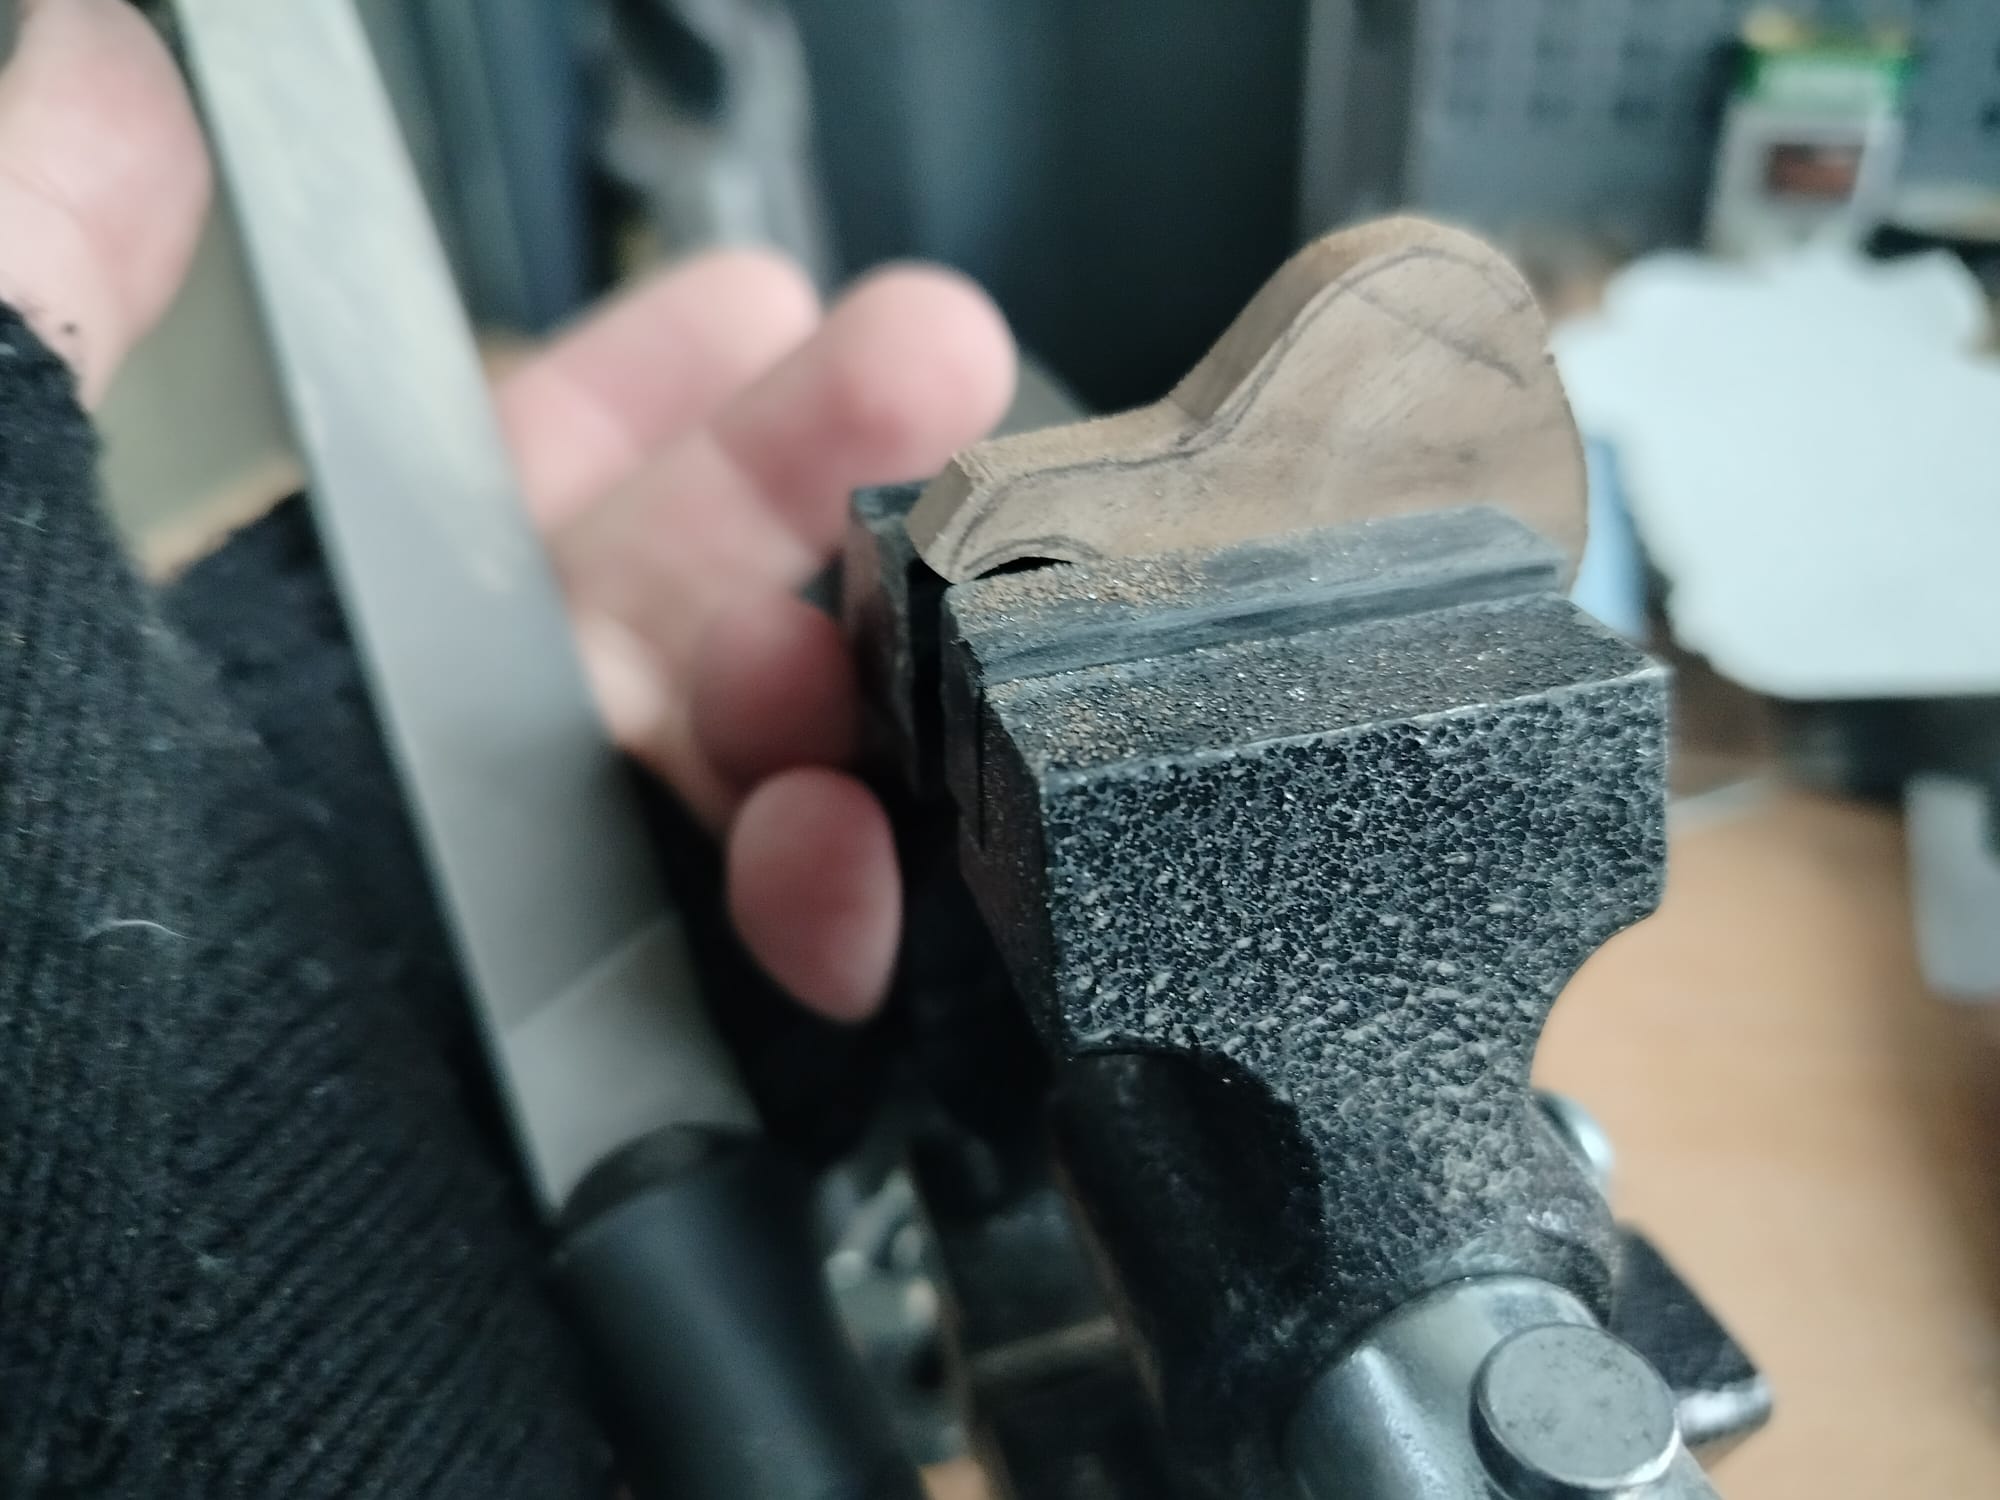
And after that, the part I like the most, it’s the filing and final shaping. Here I use my trusty multifunction bench vise with plastic jaws as to not damage the wood. I use a variety of files here, larger metal files are useful for bulk removal and smaller key files are useful for details. The round and half round files were especially useful here with the curvy shapes of the body and the headstock.
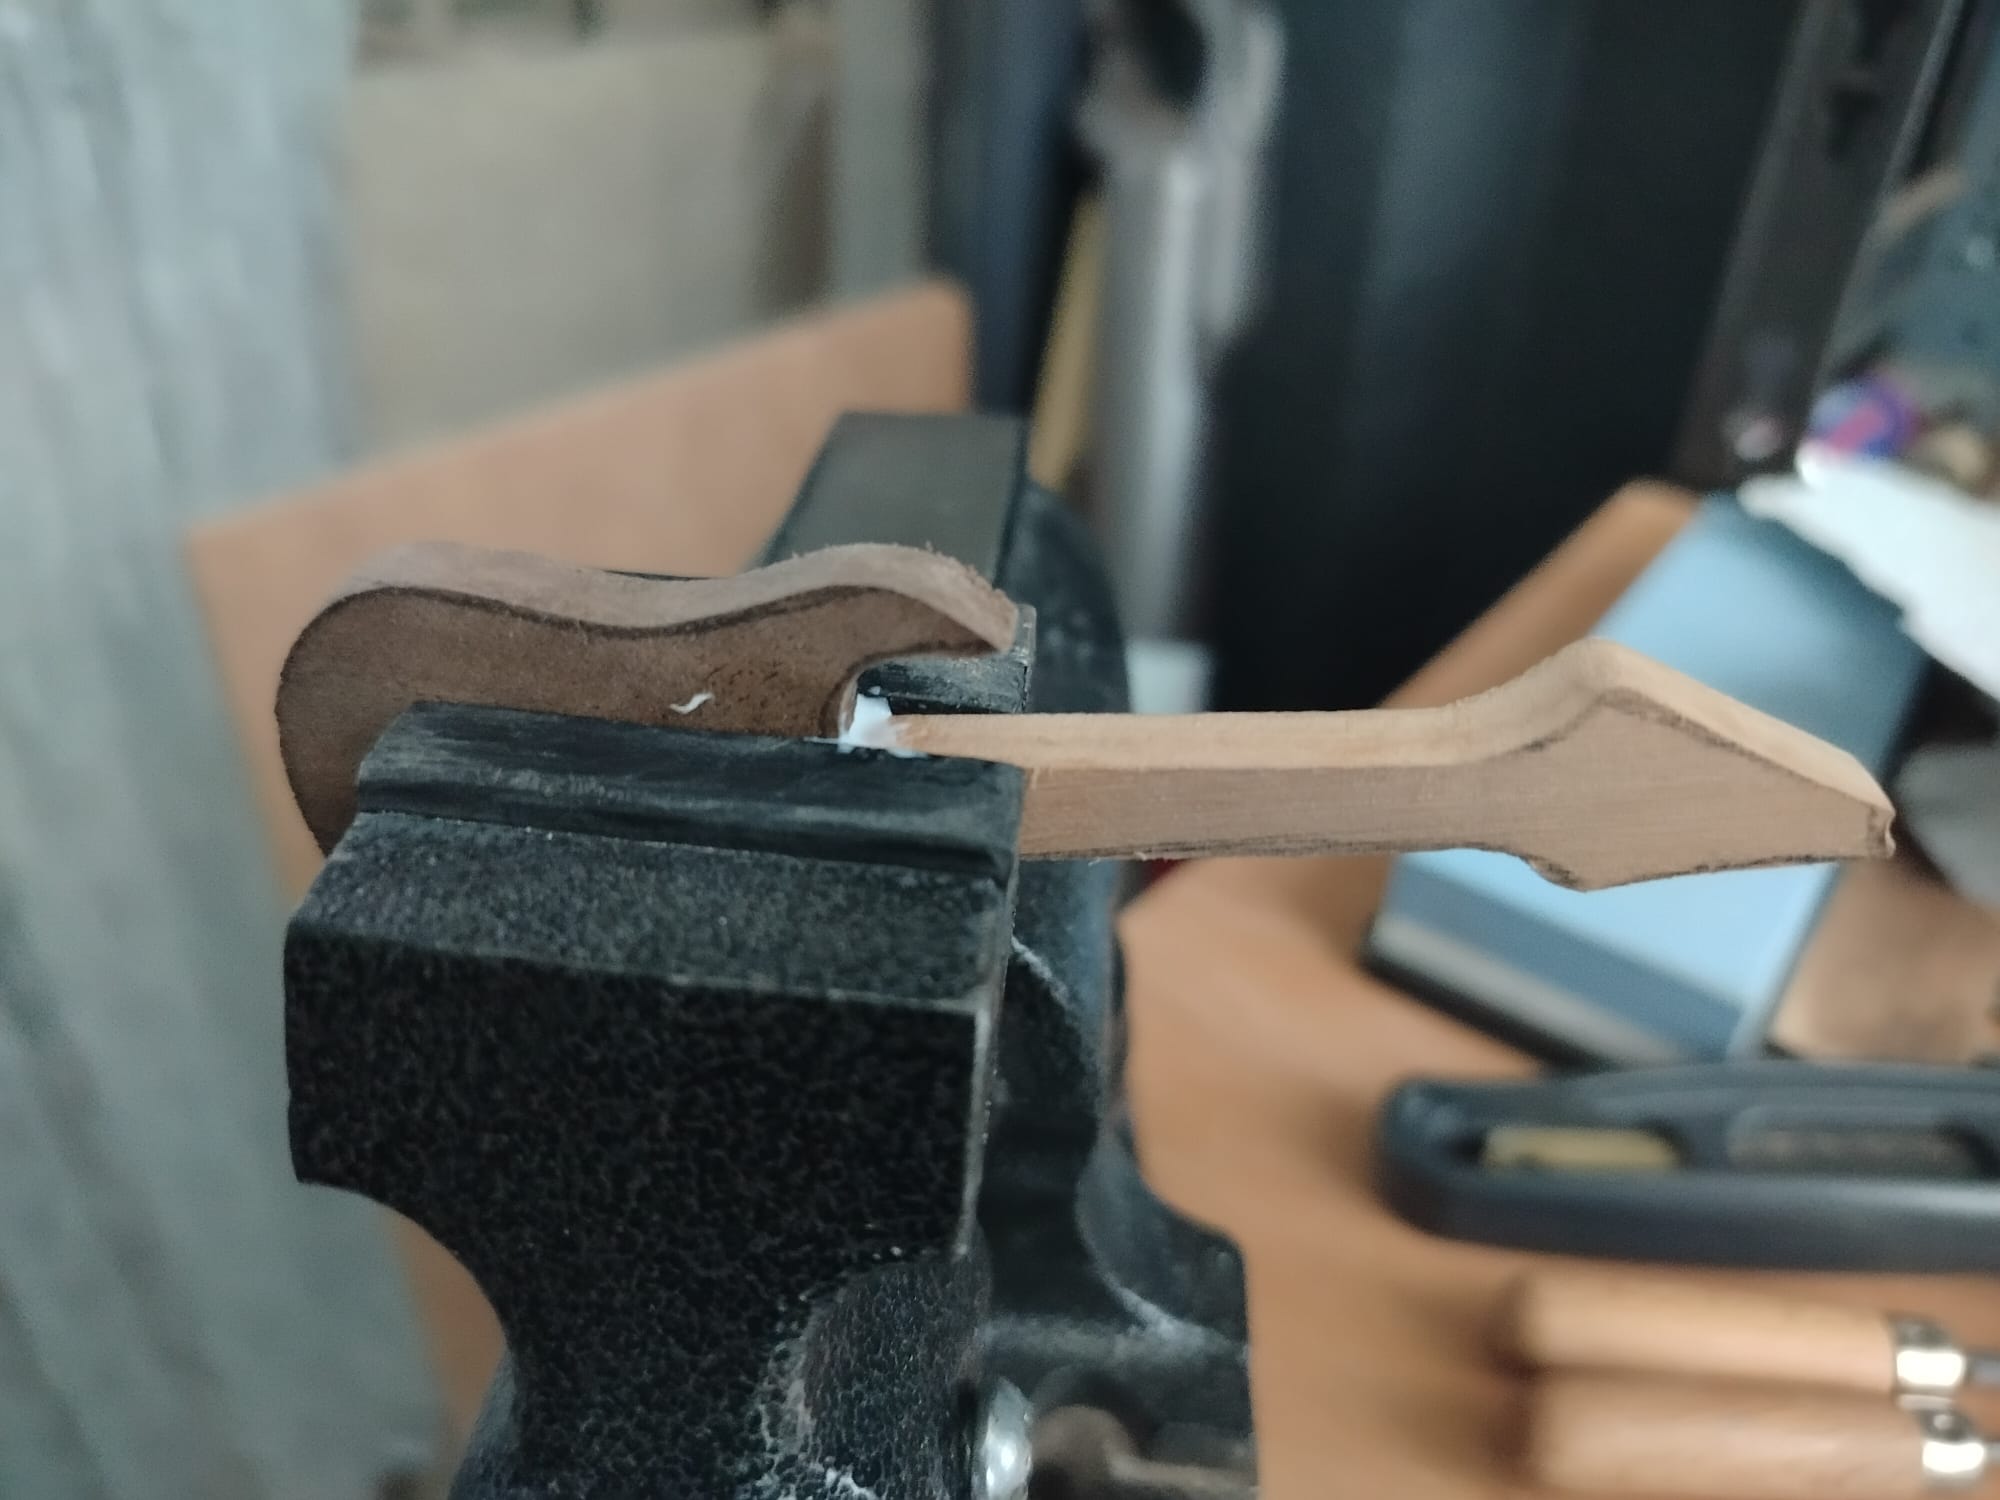
After the filing is done, I had the two separate pieces and now was the time to connect them together. I did some extra filing to get the fit exactly right and rather tight so the wood glue would stick well. I then glued them up and stuck them into the vise with the jaws gripping very tightly.
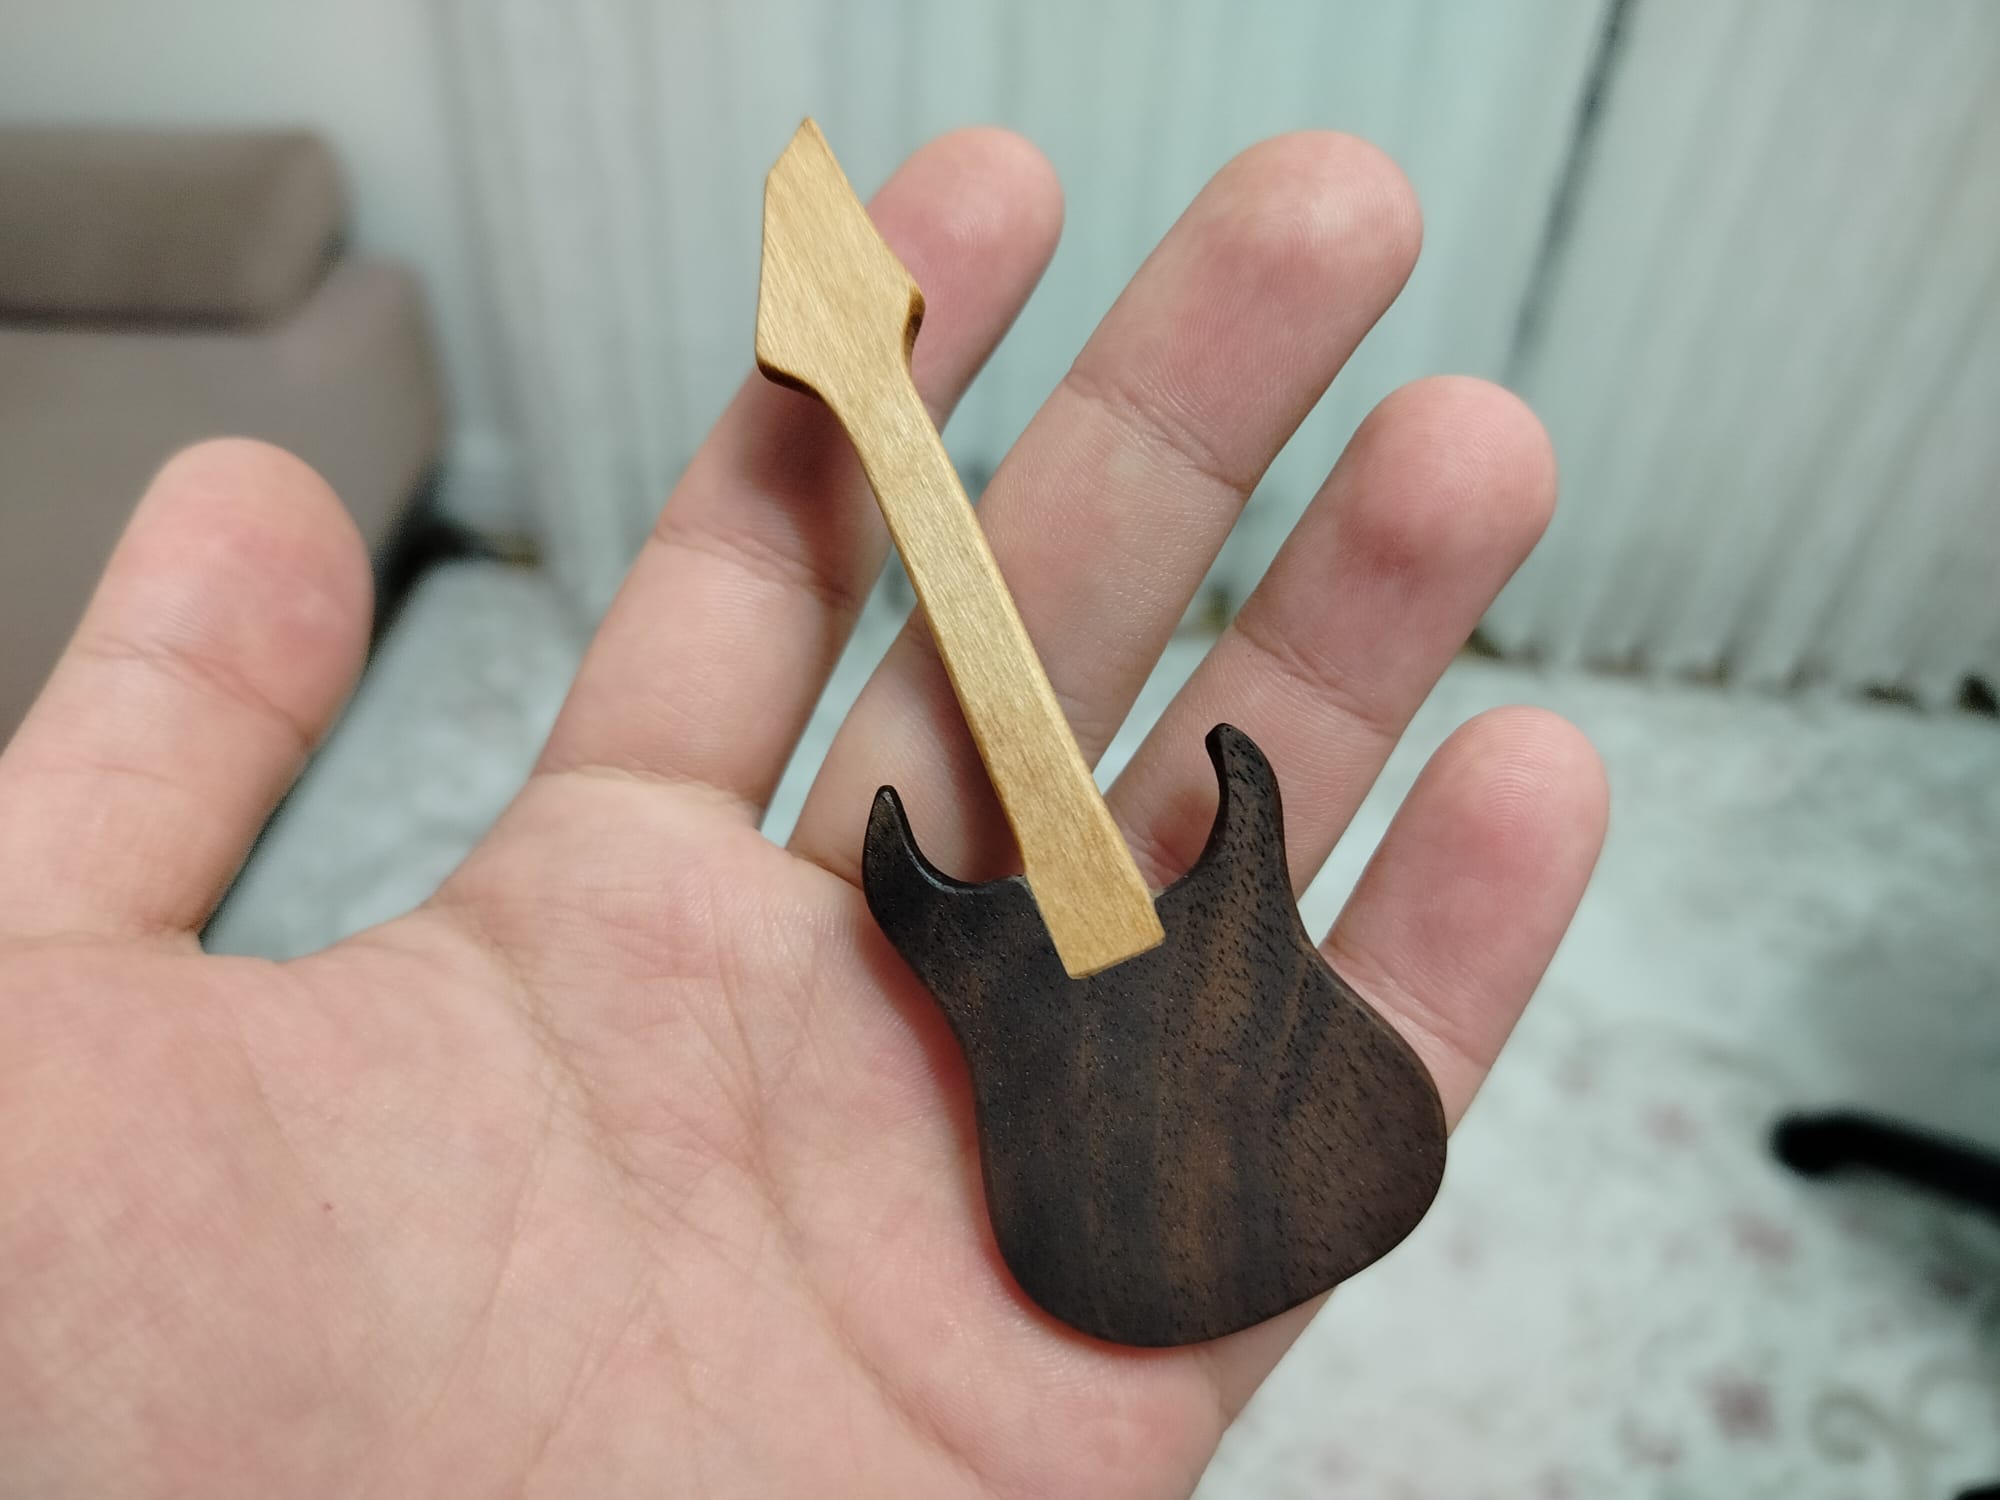
I wanted to finish the entire project in one day so I only waited for around 2-3 hours for the glue to cure before moving to the final sanding. The joint was already rather tight and the glue did a great job of filling the final small gaps so after the initial rough sanding, the joint looked pretty much perfect. I did the rough sanding with 80 grit white sandpaper (the ones made specifically for wood, that stuff is amazing, thanks Bauhaus!). I also went back to the vise and files to change the shape of the headstock a bit as I wasn’t that happy with it initially. After the final filing and rough sanding one more time, it was time for the final sanding. I went with a 120 -> 220 -> 320 -> 400 -> 600 grit progression.
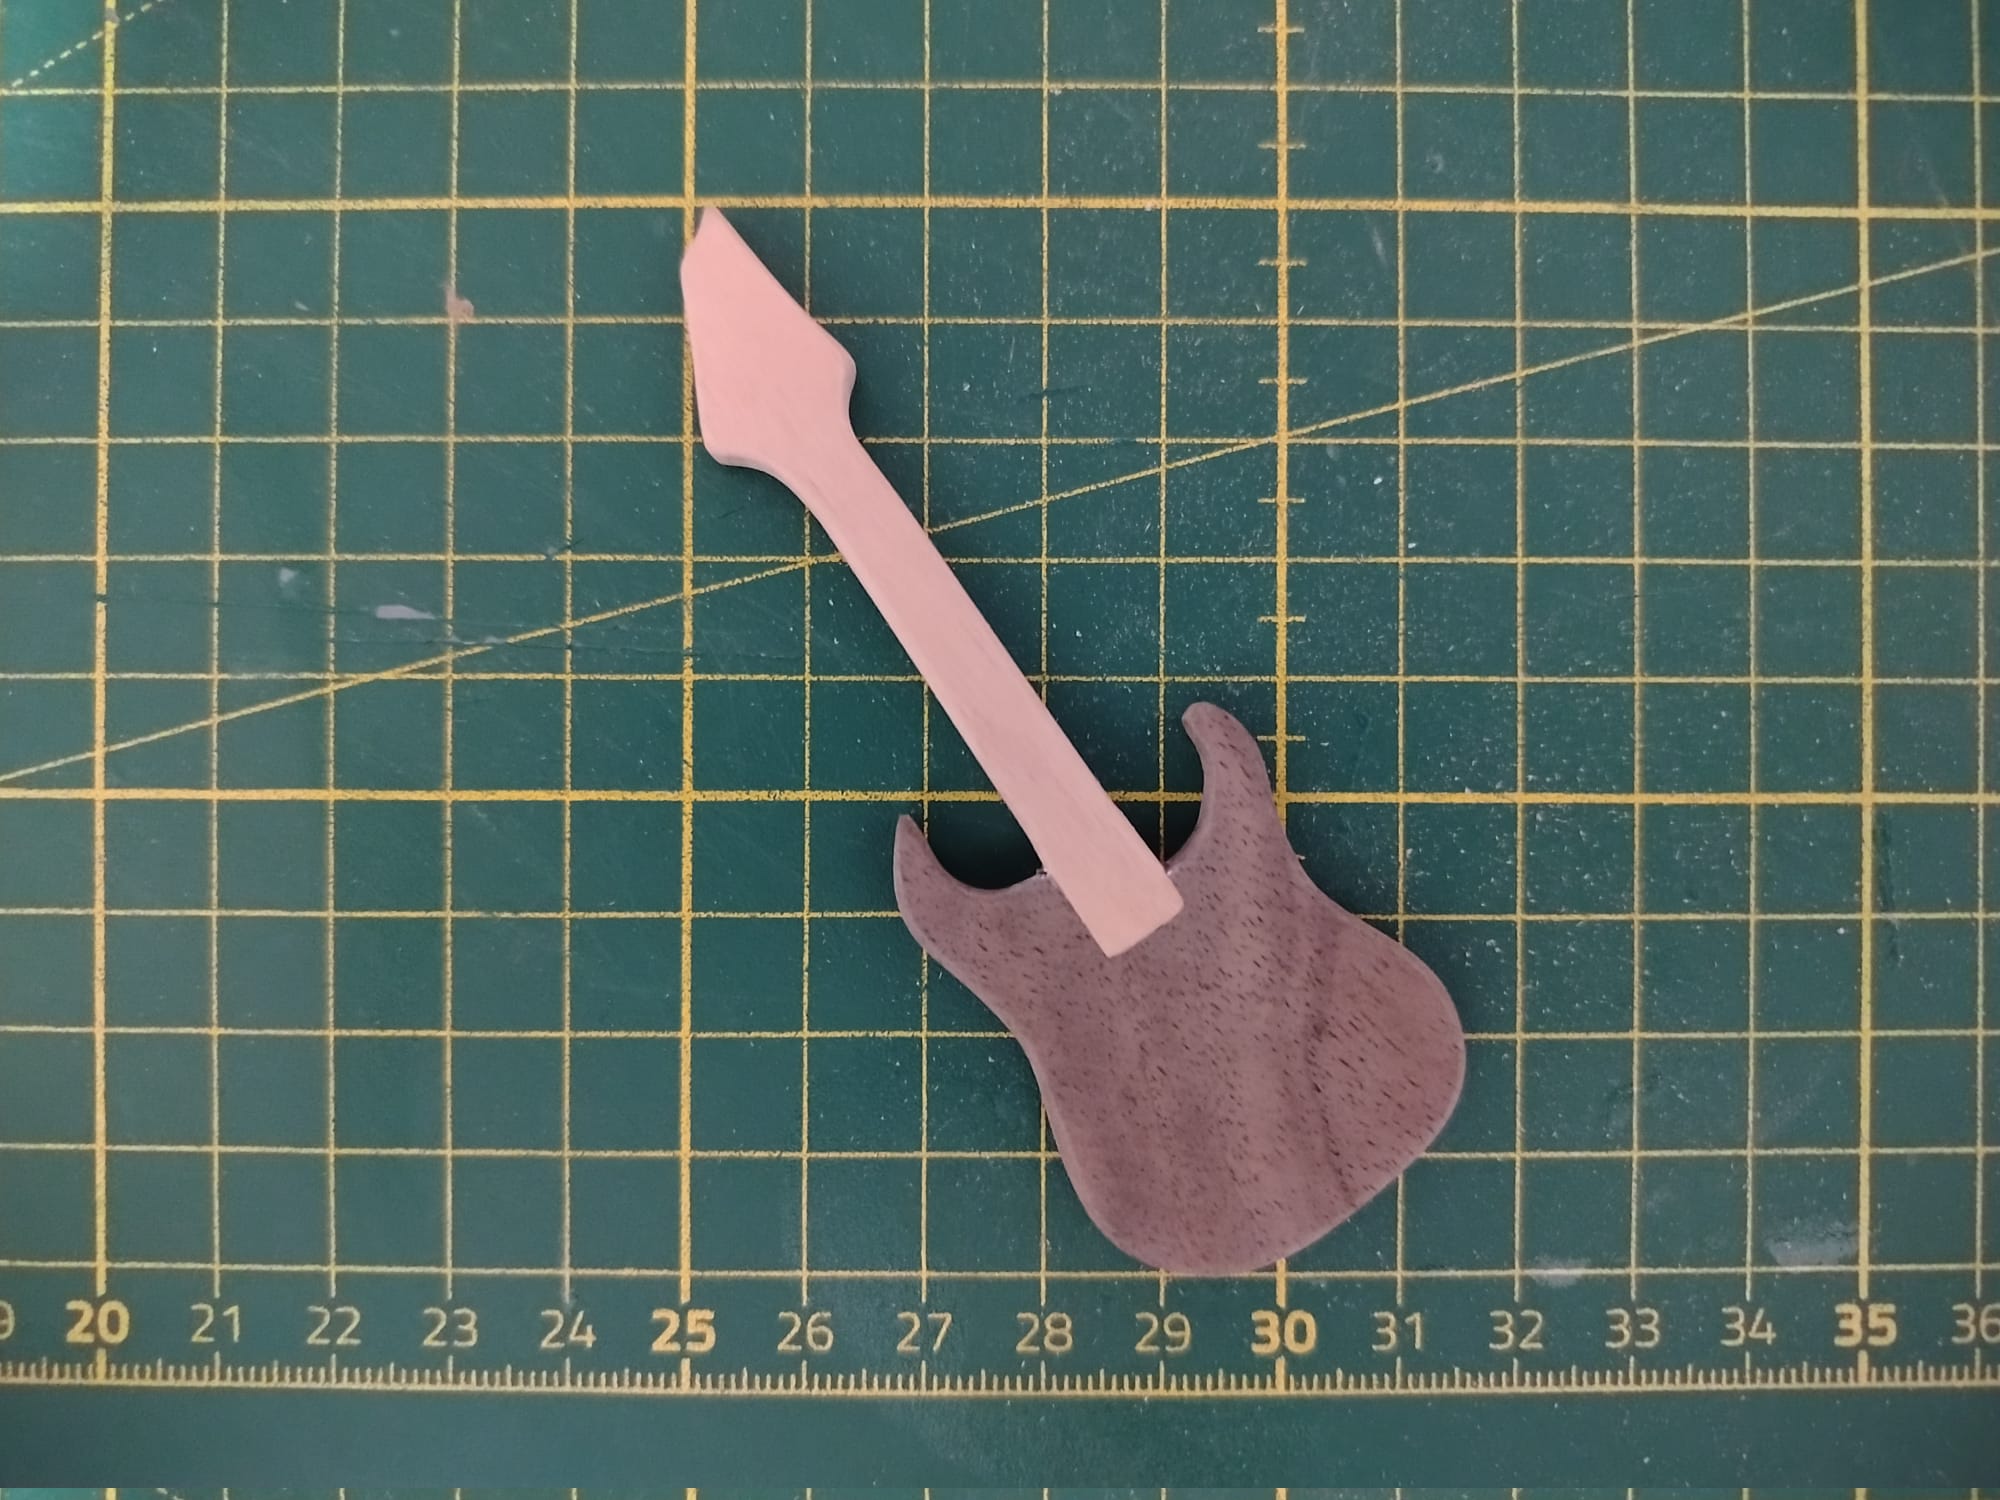
And after a whole lot of hand sanding (I hate hand sanding 💔) it’s finally the best part: the oiling. I especially love oiling smooth walnut because the color change is absolutely AMAZING! Anyway and this is how it looks after the oil, absolutely gorgeous and EXACTLY like how I imagined it initially.
Thanks for reading!